

Yields approx. 16 Servings
Elements:
A MEAT THERMOMETER– very important.
One twelve pound WHOLE TURKEY → At this point your turkey should already be thawed, emptied of any giblets/neck/plastic pieces, brined, rinsed thoroughly, and patted dry.
Three-quarters cup of OLIVE OIL– not extra virgin
Three tablespoons chopped fresh ROSEMARY LEAVES + some extra sprigs to put inside the cavity
Two tablespoons chopped fresh BASIL (can use two teaspoons dried)
Three tablespoons minced fresh GARLIC
One teaspoon ground BLACK PEPPER
One medium ONION, peeled and quartered
One LEMON, washed and quartered
FOIL
A little CANOLA OIL
Application:
Preheat your oven to 500F degrees. (Yes, you heard me right. Don’t worry! This will only be for a little bit to get the outside skin colored.) Place your roasting rack inside your roasting pan and set aside, ready to use.
In a small bowl, combine the olive oil, rosemary, basil, garlic, and pepper.
Set your turkey on a clean work space (a large cookies sheet will do if you don’t want to work directly on your counter top). Before you start working on the turkey, you’ll want to use the foil and canola oil to make a foil triangle to use during cooking. See the beginning part of the video in the “Tips” section to see how to do this.
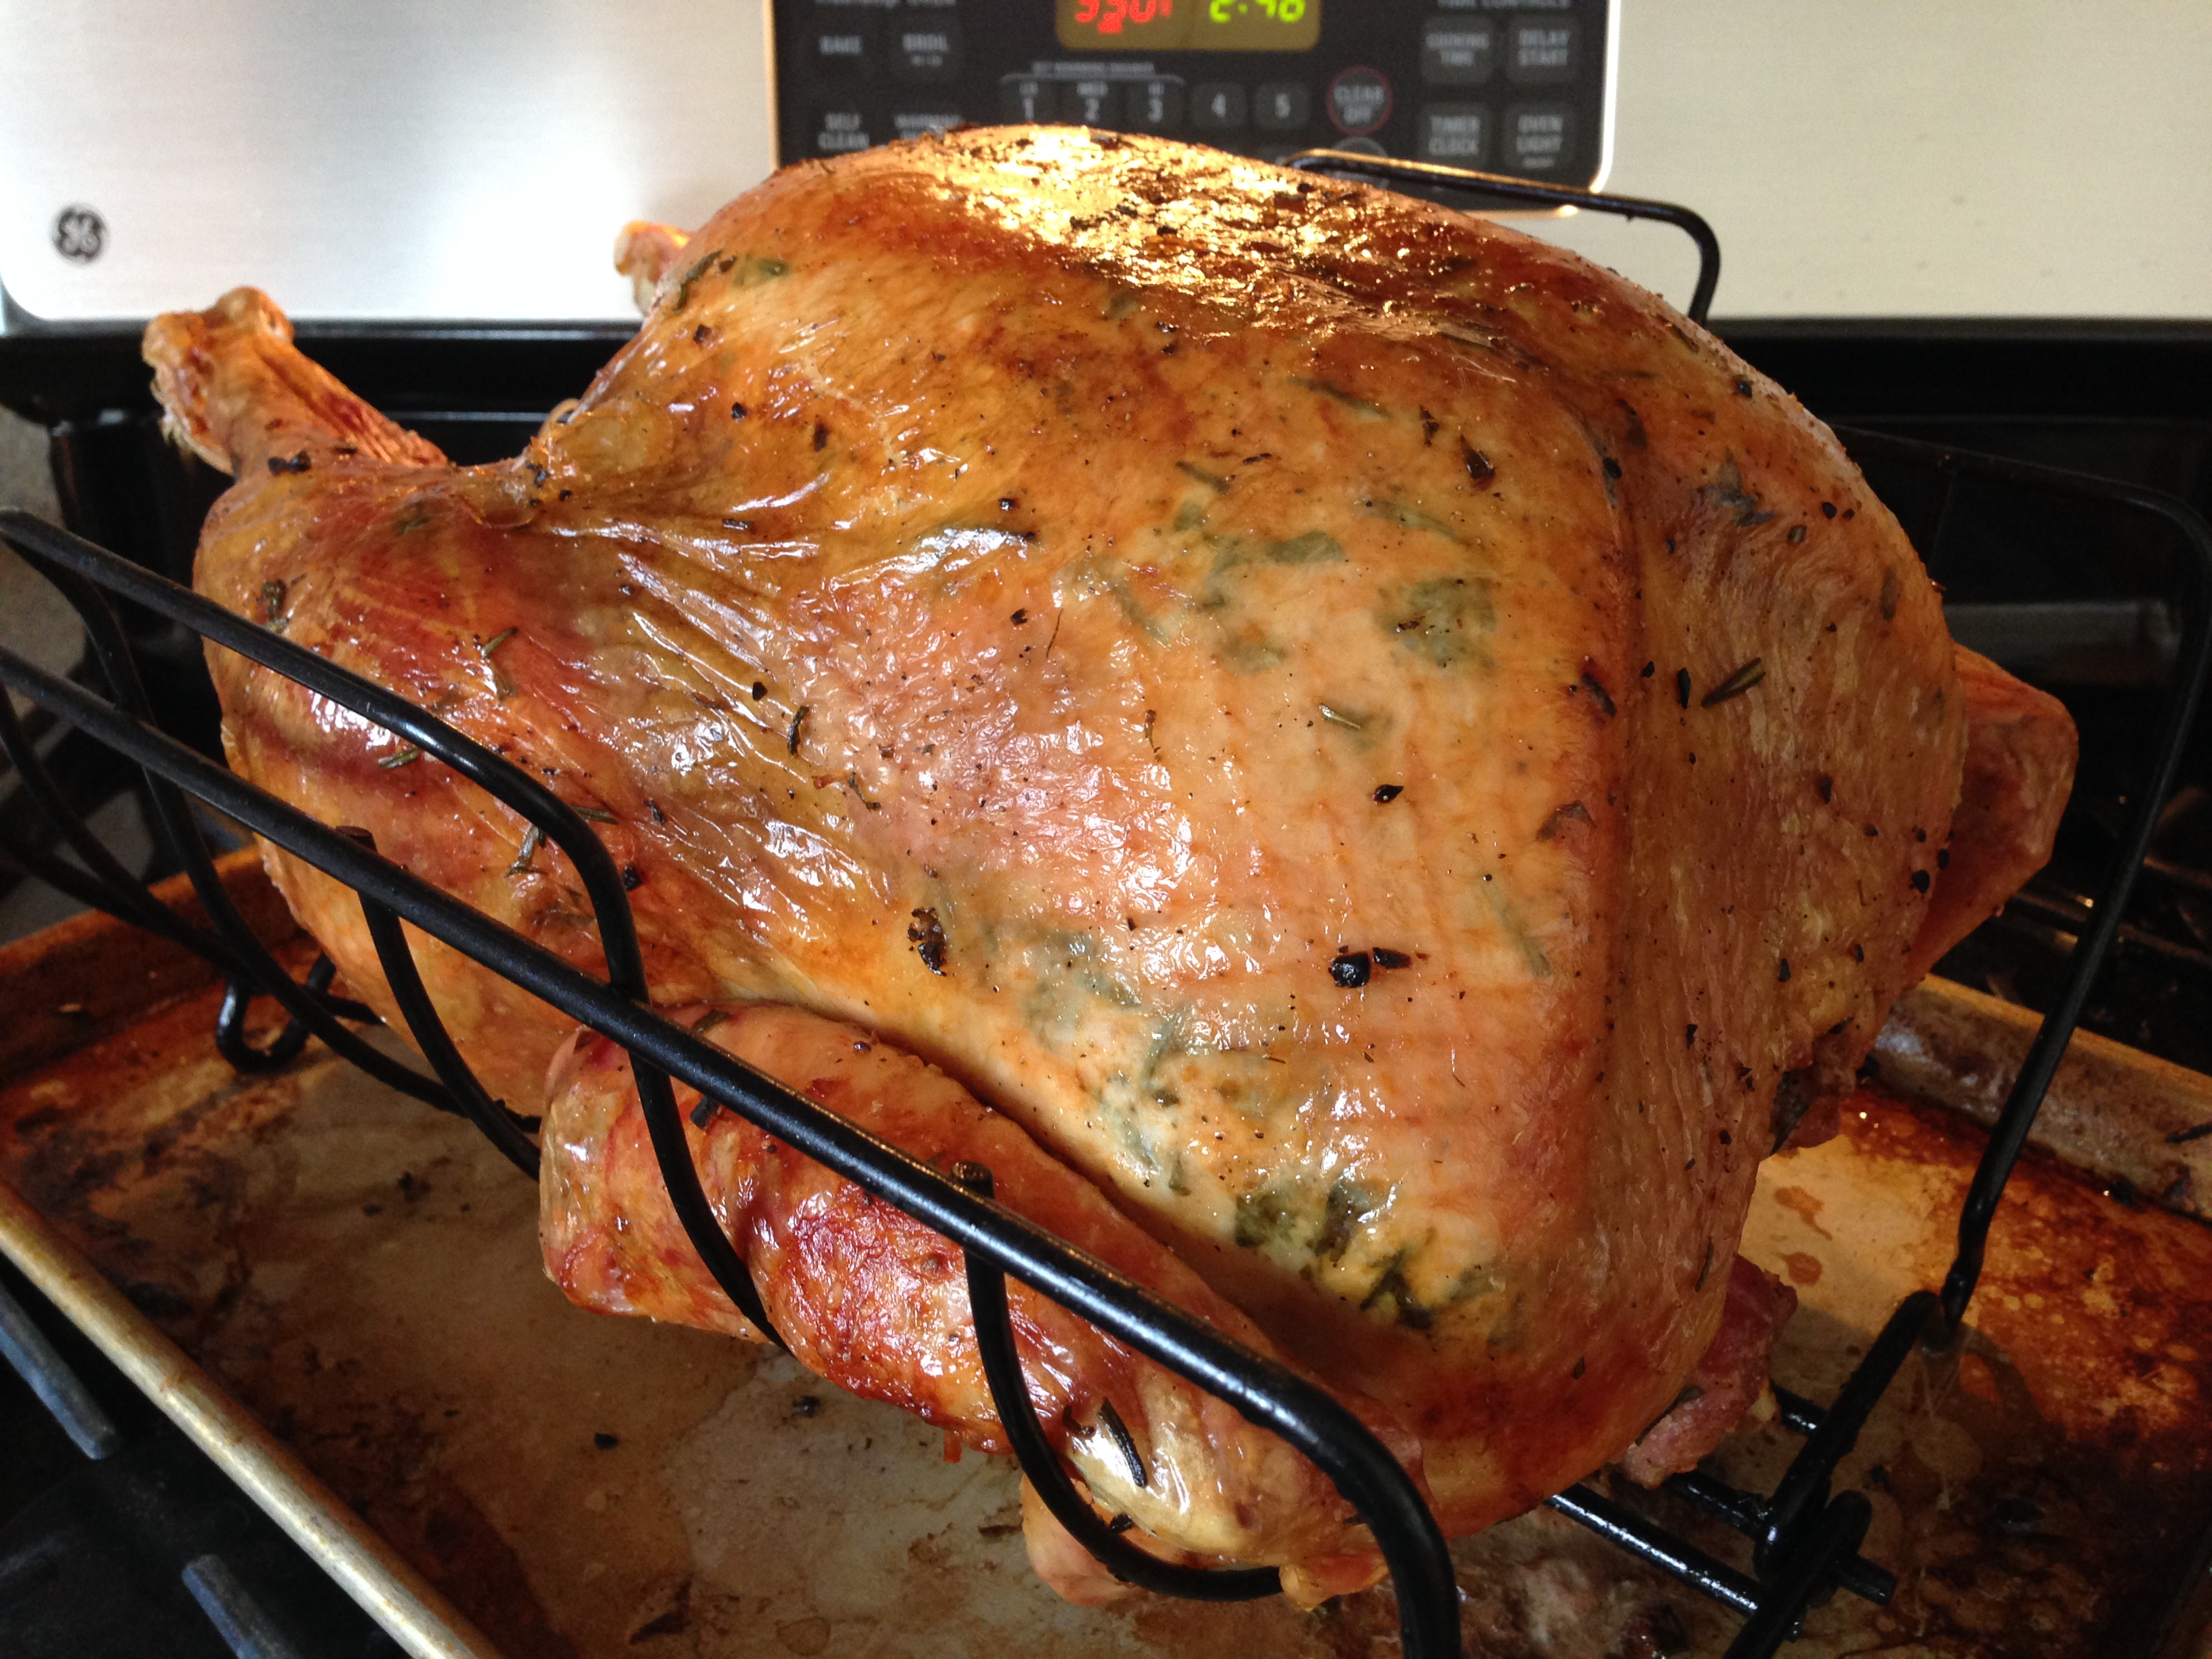
Back to your turkey– using your clean hands and starting at the neck end of the bird, slowly work your fingers underneath the skin of the breasts. Gently separate the skin from the breast meat, then the thighs and drumsticks. Be careful to not tear the skin. Now, using your hands again, spread the oil/herb mixture underneath the turkey skin on the breasts, thigh, and drumsticks. Massage it all in well! Use the rest of the oil mixture to rub all over the outside of the skin and even inside the cavity. If you accidentally tore any parts of the skin, use toothpicks to secure the skin over any exposed meat.
Place your turkey on the rack in the roasting pan. Tuck both ends of the wings underneath the top of the bird. Place the quartered onions and lemons inside the cavity, along with a few extra sprigs of fresh rosemary. Place the turkey/roasting pan inside the preheated 500F degree oven just until the outside gets golden….approximately 20-30 minutes, depending on the size of your bird and your oven. Just keep a close eye on it. This is so you can get a beautiful golden brown color on the outside of your turkey. Remember, it still has to cook longer hours at a lower temp. Make sure you open up the windows and get air circulating. The olive oil will make things a little smokey at that high of a temperature. You could use canola oil for the rub instead, but I just deal with the smoke because I like the olive oil better. 😉
Once the outside is golden brown, open the oven and pour 1/4 inch of water into the bottom of the roasting pan, reduce your oven temperature to 325F degrees, place the foil triangle over the turkey breasts, and cook for about 2.5 more hours– OR, really until the internal temperature of the breast meat reaches 165F degrees and your house smells amazing. The variation in your turkey size and oven heat may make your cooking time different from mine. As long as your meat thermometer reads 165 degrees when inserted into the middle of the thickest part of the breast, you’re good to go! (Also make sure the thermometer is not touching any bones, as that affects the reading.)
Once you’ve reached the correct internal temperature, remove the turkey from the oven, tent it with foil, and let it rest for at least 20 minutes before carving. This is important, as it allows the juices to redistribute throughout the meat, keeping it tender and juicy.
To make the Gravy:
(This will make approx. 2 Cups…depending on the amount of drippings you have.)
First you need about three cups of strained TURKEY STOCK– made by simmering the TURKEY NECK & GIBLETS (minus the liver–it can make the stock bitter) with four cups of WATER in a saucepan for 1.5 hours. You can make this the day before and store it in an air-tight container in the refrigerator until ready to use.
Once your turkey is done roasting, remove the turkey and rack from the roasting pan. Scrape up whatever browned bits are at the bottom of the pan. If there isn’t that much liquid at the bottom of your roasting pan, add a quarter cup of water while the pan is still hot to deglaze it. Pour all the DRIPPINGS into a large measuring cup or bowl. Allow it to sit for a few minutes so the fat can rise to the top. Skim off the excess fat, leaving a few tablespoons floating on top.
Pour your drippings back into the roasting pan if you can use it directly on the stove OR pour it into a sauce pan and place it on the stove over medium heat. Whisk in 3 cups of turkey stock and allow it to come to a boil.
In a separate cup or bowl, pour in 3-4 tablespoons of flour. Stir in some water, little by little up to one cup, making sure to mix thoroughly in between each addition. You want to dissolve the flour completely so there are no flour chunks going into your gravy.
Once your stock is boiling, whisk in the flour-water little by little until the stock starts to thicken. (You may not need to add all of it.) Continue to whisk and allow the gravy to simmer for several minutes (adding more stock if it gets too thick), then remove it from the heat. SALT and PEPPER to taste, then pour it into your gravy boat for serving.
Tips:
*Just a reminder that, first and foremost, you should make sure your turkey is completely THAWED the day before Thanksgiving so it’s ready to soak in the brine overnight. Thawing a frozen turkey in the refrigerator is the safest method. A frozen turkey needs one day of thawing in the fridge for every 4 to 5 pounds.
**Also, for the absolute dreamiest results, brine your thawed turkey for 12 hours before it’s time to cook. (If you are using a fresh turkey instead of frozen, you may need to soak it in the brine longer and add more salt to your brine solution. You’ll have to google that info, as I haven’t tried using a fresh, not-previously-frozen turkey yet.)
In order to thoroughly cook the dark meat but NOT dry out the white meat, make a foil triangle to cover the breast of your turkey! To learn the easiest way to do this, follow Alton Brown’s instructions in the beginning of this video:


